Lower back pain has become one of the most common health problems today, especially in women. And there are multiple reasons for it. Long sitting hours, poor posture, lack of movement, stress, and weak core muscles often lead to stiffness and discomfort in the lower back. The good news? You don’t need a gym or expensive equipment, simple yoga practices done at home can significantly reduce lower back pain and improve flexibility and strength.
This article will guide you through safe, effective yoga poses for lower back pain, along with important tips to practice at home.
Can Yoga help with lower back pain?
Yes, Absolutely. Unlike other intense workouts, yoga is all about the slow, controlled, and mindful movements. Yoga primarily focuses on Gentle stretching of the tight muscles, strengthening of the back and core, improving spinal alignment, and reducing stress, which often worsens the pain. All of these things make yoga ideal for people with back discomfort.
Important Safety Tips before you start:
- Always practice this routine on a YOGA MAT or a moderately soft surface.
- Move slowly with the breathing pattern mentioned in the technique.
- STOP if you feel sharp pain.
- Please avoid or consult a medical practitioner before you practice this routine if you have a history of 1) Recent back injury, 2) Neurological issues, 3) Spinal issues like slipped disc, etc.
Best Yoga Poses for Lower Back Pain at Home
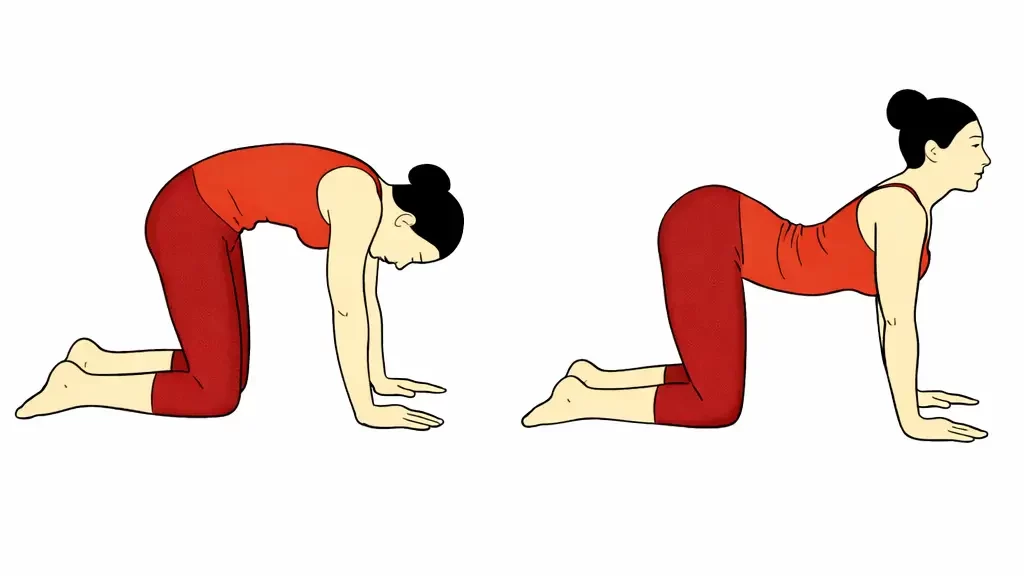
1) Cat-Cow Pose:
Cat Cow Pose, known in Sanskrit as Marjaryasana-Bitilasana, is a foundational yoga flow that beautifully synchronizes breath and movement to gently warm up and increase spinal flexibility. This dynamic pose strengthens the arms, legs, and core while stretching the back, torso, and neck.
Technique:
- Go on all fours. Make sure that your wrists are exactly underneath the shoulders, and your knees are exactly underneath the hips.
- Keep your neck long by looking down.
- Inhale, tilt your pelvis to the back so that your tailbone sticks up. Your belly will hang down, but contract the abdominal muscles as if they are hugging the spine.
- Gently, move your neck and try to look towards the ceiling.
- Spine movement should start from the tailbone, neck is the last thing you will move.
- Hold this position as long as you can. This is a COW Pose.
- Now, with exhale, you have to move into the CAT pose through starting position.
- Tilt your pelvis forward so that your tailbone tucks in. Draw your navel towards the spine.
- Drop your head and gaze towards your navel. This makes the natural round shape of the spine.
- Stay in this position as long as you can.
- Repeat both poses two more times.
Benefits:
- Flexing and extending the spine increases the circulation in the discs.
- Relieves tension in the spine and back muscles.
- Improves posture and balance.
- Calms the mind as the pose is normally practiced with mindful breathing.
Variation:
You can practice the Cat-Cow pose in a chair also. It is absolutely magical for desk workers.
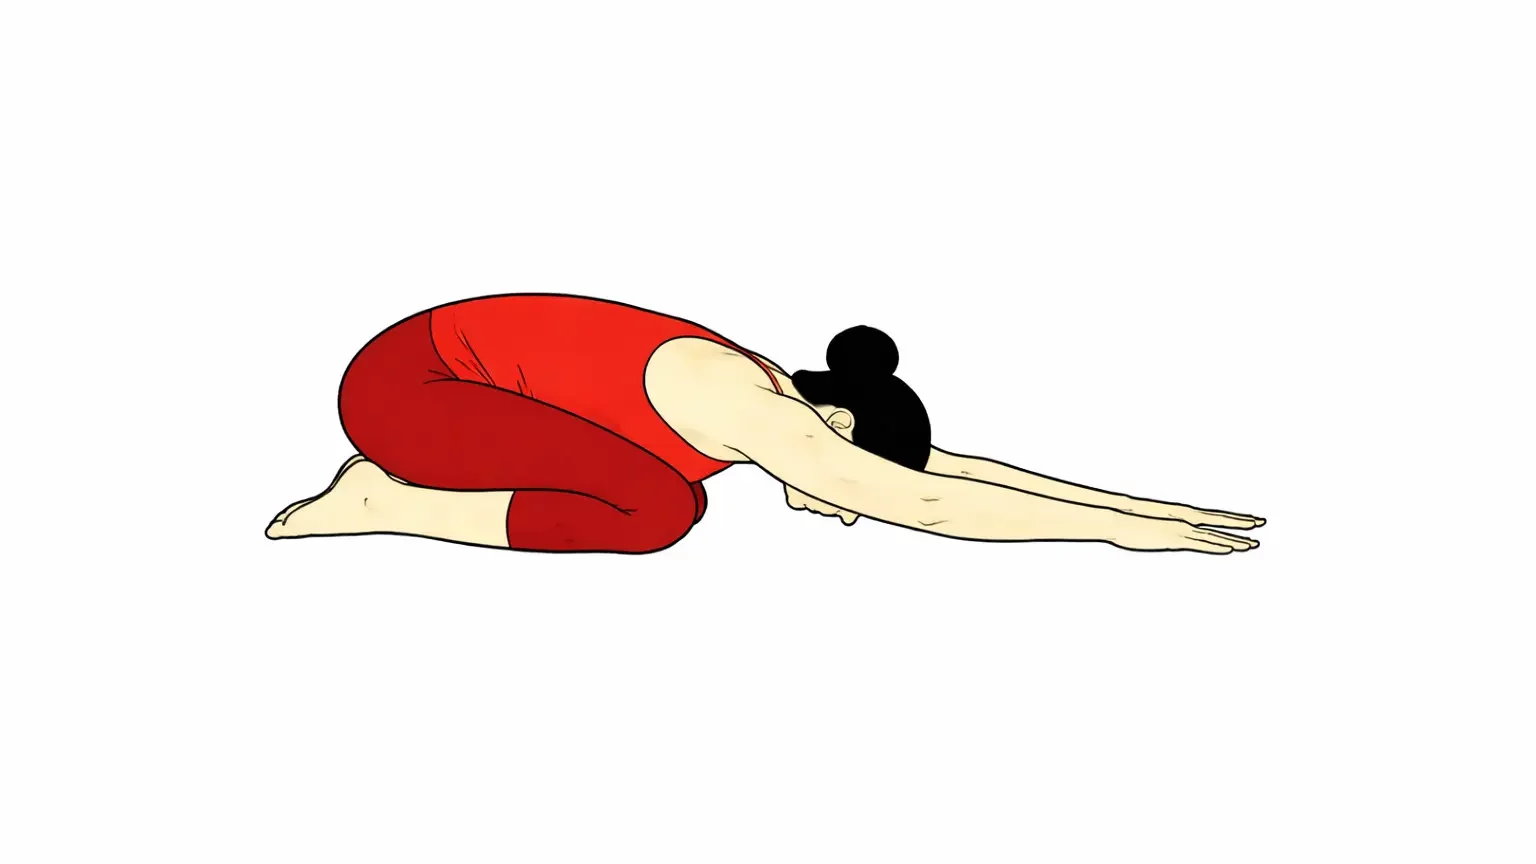
2) Child Pose:
Child Pose (Balasana) centers on creating a moment of rest where the body can be still. It is a foundational yoga posture that reminds us that inaction can be as valuable as action.
Technique:
- Kneel and sit on your heels with your big toes touching each other. Keep the distance between your knees as wide as your hips. (Or you can sit in Vajrasana too; this helps in massaging your abdominal organs)
- Exhale, and bend forward. Your torso should rest between your thighs.
- Extend your arms forward and rest your neck by touching your forehead on the mat.
- Relax, drop your spine and shoulders down. You will feel the calm of this pose.
- As this is a resting pose, you can stay in this pose anywhere from 30 seconds to a few minutes. (Keep normally breathing during this)
- While coming up, inhale and lift your torso from the tailbone and sit upright.
Benefits:
- Stretches the entire spine from the tailbone to the head.
- The pose may look simple, but it stretches the back muscles, glutes, shins, and ankles.
- It activates the parasympathetic nervous system (Relaxation Response) and deactivates the Sympathetic nervous system (Stress Response). So it helps lower the stress.
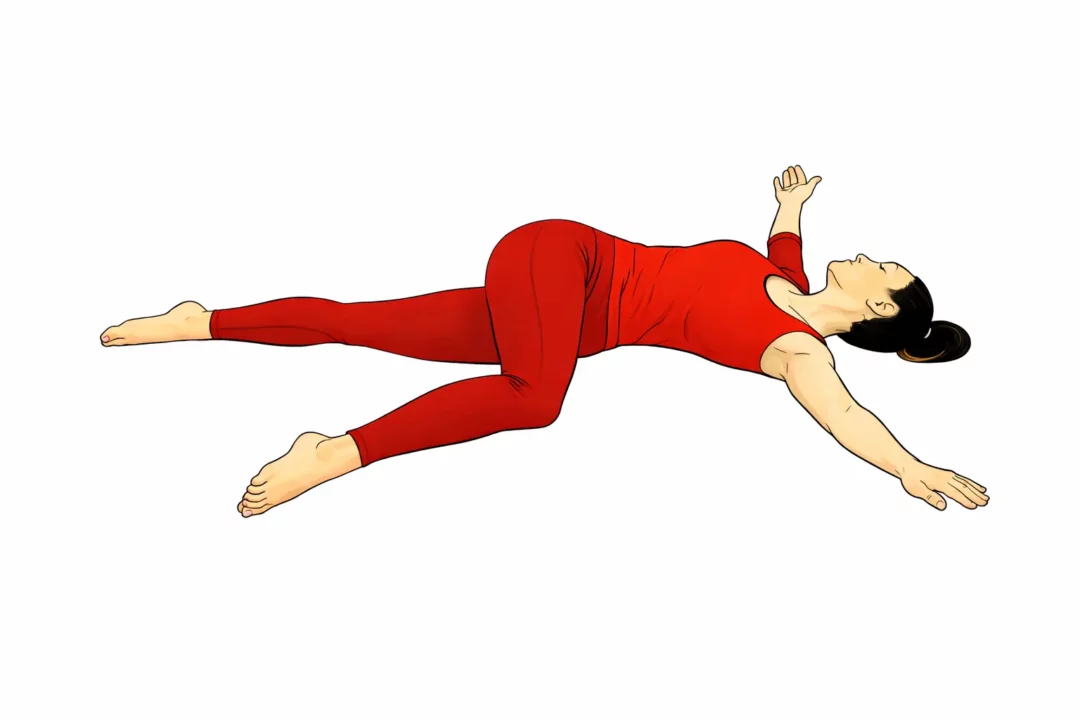
3) Supine Spinal Twists:
Supine Spinal Twist, aka Supta Matsyendrasana, is a great way to stretch, restore, and detox the body. Hang out in this posture as long as you feel right and work on letting go of anything that is not serving you.
Technique:
- Lie down on your back, bring your arms out, and extend them to the sides.
- Bend your right leg and place the right foot near the left knee.
- Exhale and slowly drop the right knee to the left side of your body, twisting the spine and lower back. (Right foot can be placed on the left knee, or you can bring it to the left side and place it on the mat)
- Make sure your shoulders are not lifted from the mat.
- Hold this position as long as you can and keep normally breathing during the pose.
- Inhaling, come to the starting pose slowly, stretch the right leg, and relax.
- Now repeat with the left leg to the right side.
Benefits:
- Relieves tension in the lower back.
- Enhances Spinal flexibility.
- Relieves tension in the shoulder muscles.
Note: To feel the effectiveness of this pose, practice this pose just before the Shavasana, after your yoga routine.
4) Bridge Pose:
Bridge Pose (or Setu Bandhasana) is a safe and rejuvenating back-bend great for beginners and experienced.
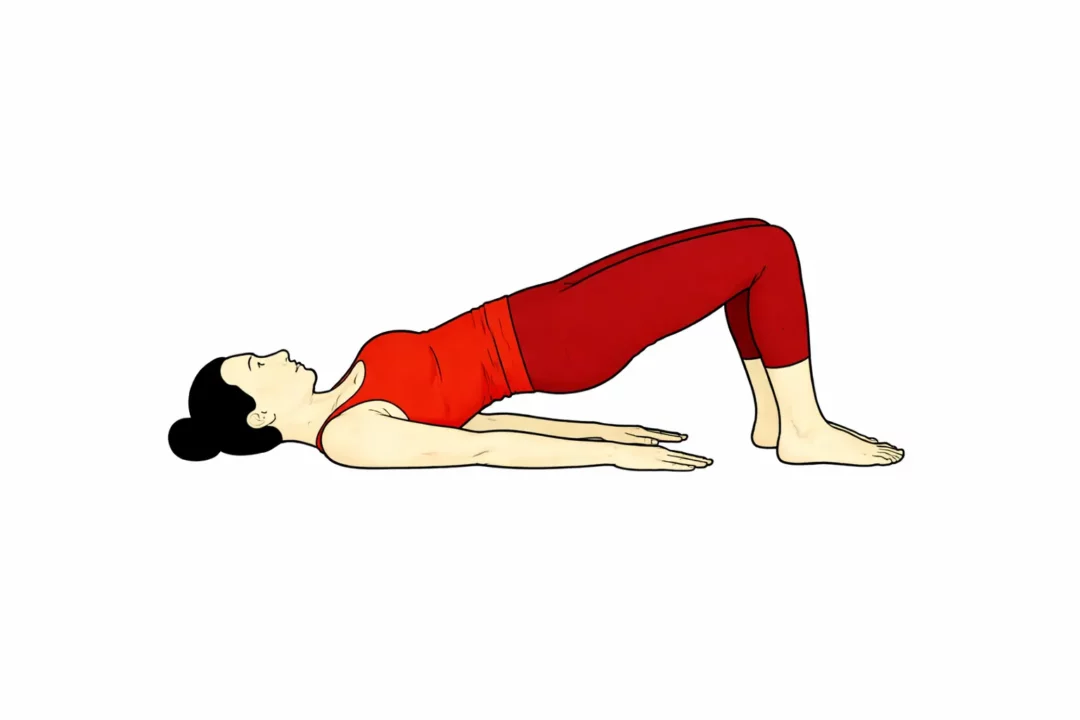
Technique:
- Lie down on your back.
- Bend both legs and place the feet near your buttocks, hip distance apart.
- Now place your arms alongside your body, palms down near the hips.
- As you inhale, press down on your upper arms and feet, and lift your hips.
- Your body, from the chest to the knees, forms a ‘bridge’ like structure.
- Hold this position breathing normally.
- With exhale, lower the body slowly and relax.
Benefits:
- Strengthens legs, glutes, core, and back muscles.
- Aids digestion by contracting abdominal muscles, reduces bloating.
- Improves posture and counteracts slouching.
- Boosts circulation and improves heart health.
5) Knees-to-Chest Pose:
Knees to Chest Pose, aka ‘Apanasana’ is a wonderful way to release the lower back. It might look similar to the ‘Pavanmuktasana’ or Wind Release Pose, but there is a slight difference in the head position.
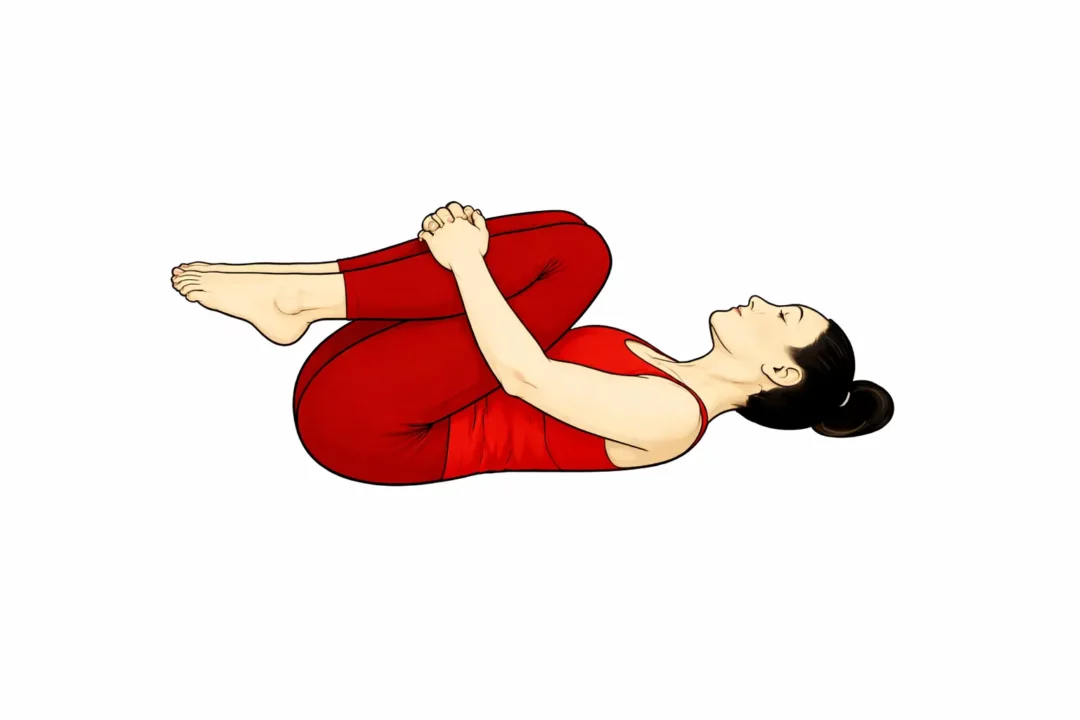
Technique:
- Lie down on your back with legs stretched out and arms alongside your body.
- With exhale, bend both legs and hug the knees into the chest.
- Try to grab the opposite elbow with the opposite hand.
- Make sure your head and back are well rested on the mat.
- Hold this position as long as you can while breathing normally. (For additional back massage, roll your body to the right and left.)
- To release, exhale, and take the legs out and arms alongside your body.
Benefits:
- Stretches the lower back.
- Opens the hips and helps release gas.
- Improves digestion.
Common Mistakes to Avoid:
- Jumping straight into the Yoga Poses: Jumping straight into the poses without warmup can make your lower back more vulnerable to strain. Start your yoga routine with micro exercises.
- Forcing the Stretch: Move only until you feel a comfortable stretch, not sharp pain. Yoga should feel soothing, not aggressive.
- Holding the Breath: Maintain slow, deep breathing throughout every posture. Breath guides movement.
- Practicing on a Hard or Slippery Surface: A hard floor or slippery mat increases pressure on the spine and joints. Use a yoga mat or place a folded blanket under your hips or knees for support.
- Skipping Rest Poses: Include rest poses and finish with 2-3 minutes of relaxation in Shavasana.
Conclusion:
Lower back pain doesn’t have to control your life. With regular yoga practice at home, you can improve flexibility, strengthen your back, and move pain-free naturally. Start slow, stay consistent, and listen to your body.
Yoga is not just exercise; it’s long-term healing.
Frequently Asked Questions (FAQs):
Yoga for lower back pain is about awareness, patience, and consistency. Avoid the mistakes mentioned in the article, listen to your body, and your practice will become both safe and deeply healing.
For best results, you should practice yoga for 15-30 minutes daily or at least 5 days a week. Combine yoga with short walking breaks if you sit for long hours.
Yoga is not a quick-fix for any pain. The consistent practice with proper breathing pattern will surely give you relief from back pain. Apart from the article, Asanas like Cobra Pose, Pigeon Pose, Downward Dog Pose also help with lower back pain.